We are excited to introduce Spintax in OutFlo, a new way to add controlled variation to your campaign messages without creating and managing separate message steps.
Spintax lets you write several versions of part of a message. For each recipient, OutFlo selects one alternative and then fills in that recipient's variables. Your campaign gets more natural message variety while the wording remains completely under your control.
You can now:
- Create a spintax group from the Variables menu.
- Start one instantly by typing an opening brace,
{. - Add multiple alternatives and edit them from the message itself.
- Use LinkedIn, sender, CSV, list, custom, or API variables inside individual options.
- Preview the resolved message before saving your campaign configuration.
Why We Added Spintax
Personalization and variation solve different parts of the outreach problem. A variable changes a detail such as a recipient's name or company. Spintax changes the wording around those details.
Previously, teams had to reuse the same sentence for every lead or manually maintain several message versions. Spintax brings those alternatives into a single message block. You write and approve the possible versions once, and OutFlo selects one complete option for each recipient.
This is useful when you want to vary greetings, observations, calls to action, or complete sentences while preserving the structure and intent of your sequence.
For example, one spintax group could contain these two options:
- We are excited about {linkedin_company}
- {linkedin_company} really excited us
One recipient sees the first version and another may see the second. In both cases, {linkedin_company} is replaced with the recipient's company.
How to Use the New Spintax Editor
There are two ways to create a spintax group. Both open the same alternatives editor and produce the same result.
Before You Start
Open a campaign sequence and select a message action. In Configure Message, use the Direct editor. Place your cursor exactly where you want the alternatives to appear.
Spintax is available in recipient-facing message fields, including connection messages, follow-ups, and supported InMail subject or body fields. It is not intended for AI prompt or instruction fields.
Method 1: Add Spintax from the Variables Menu
- 1.Place your cursor in the message.
- 2.Click Variables below the editor.
- 3.Select Add spintax at the top of the menu.
- 4.Enter your first version in Option 1.
- 5.Enter a different version in Option 2.
- 6.Click Add option if you want more alternatives.
- 7.Click Insert. If you are editing an existing group, click Update.
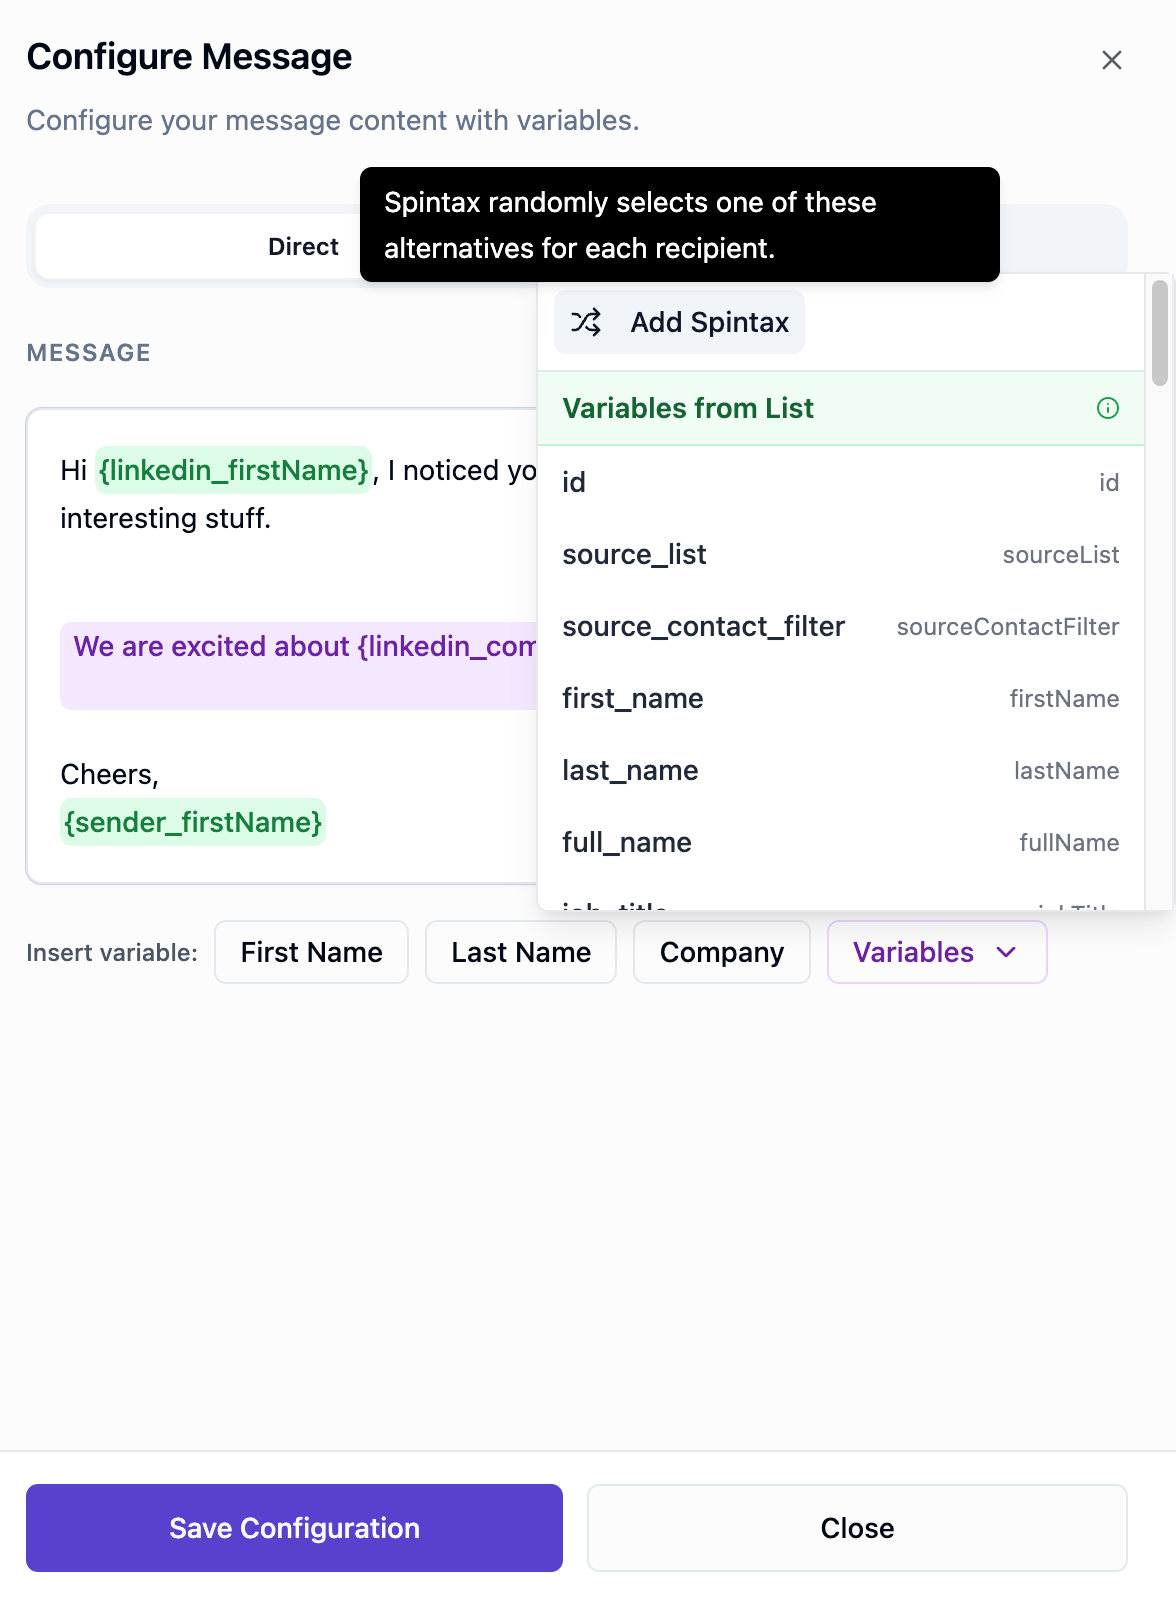
OutFlo inserts the group at your cursor and highlights it in purple. One complete option from that group will be selected for each recipient.
Method 2: Type an Opening Brace
You can open the same menu without clicking the Variables button:
- 1.Place your cursor where you want the alternatives.
- 2.Type
{. - 3.The Variables menu opens automatically.
- 4.Select Add spintax.
- 5.Add at least two options, then click Insert.
The opening brace is only a shortcut that opens the menu. OutFlo removes it when you choose Add spintax, so you do not need to finish or format the spintax syntax yourself.
Add LinkedIn or CSV Variables to an Option
Each option has a {} button on its right. Use it to insert a variable at the current cursor position inside that option.
- 1.Click inside the option where the personalized value should appear.
- 2.Click the {} button beside that option.
- 3.Search for and select a variable.
- 4.Repeat for any other option that needs personalization.
The picker can include:
- LinkedIn variables such as first name, last name, company, headline, and location.
- Sender variables such as the sender's first name.
- Variables from your imported list, including CSV columns.
- Other custom or API variables available in the campaign.
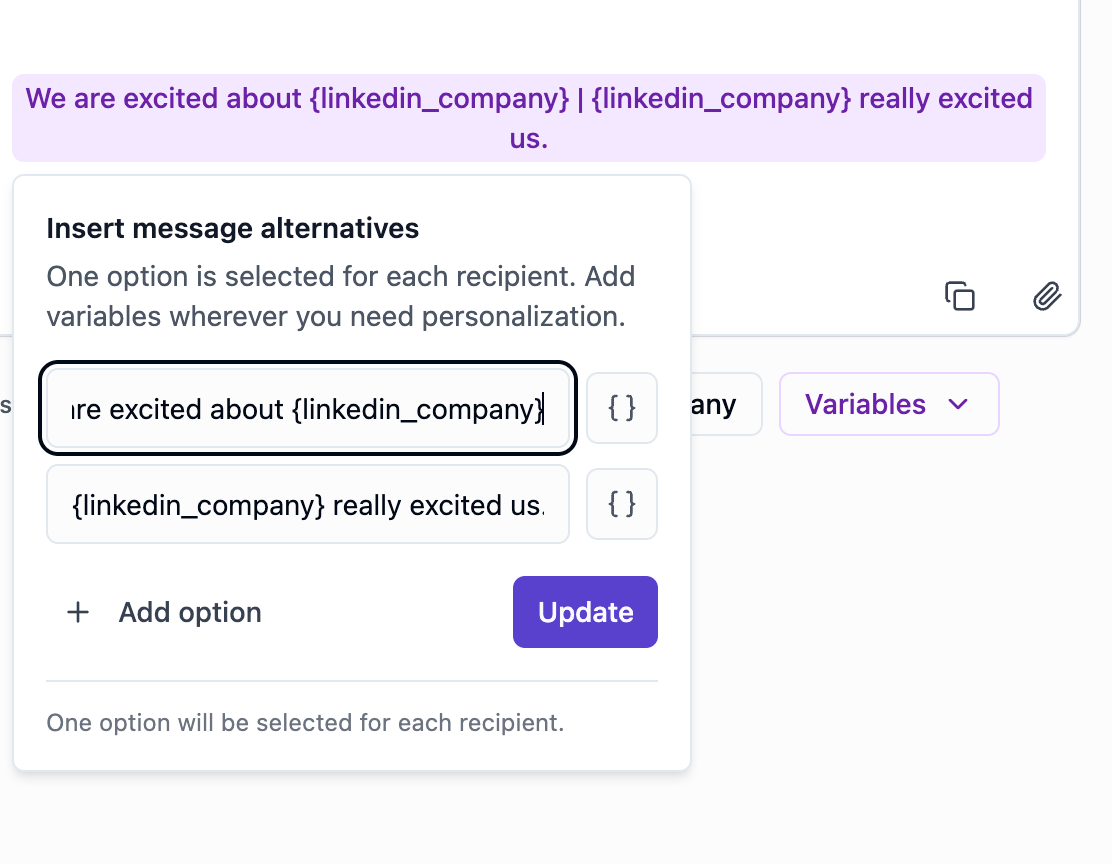
Variables do not have to appear in every option. For example:
- I noticed the work your team is doing at {linkedin_company}
- Your recent work really stood out to me
The first option uses company data; the second does not.
Edit an Existing Spintax Group
Click the purple spintax block in the message editor. The alternatives panel opens with the current values.
From there, you can:
- Rewrite any option.
- Add another option.
- Remove an option when the group has more than two.
- Insert additional variables with the {} button.
- Click Update to apply the changes.
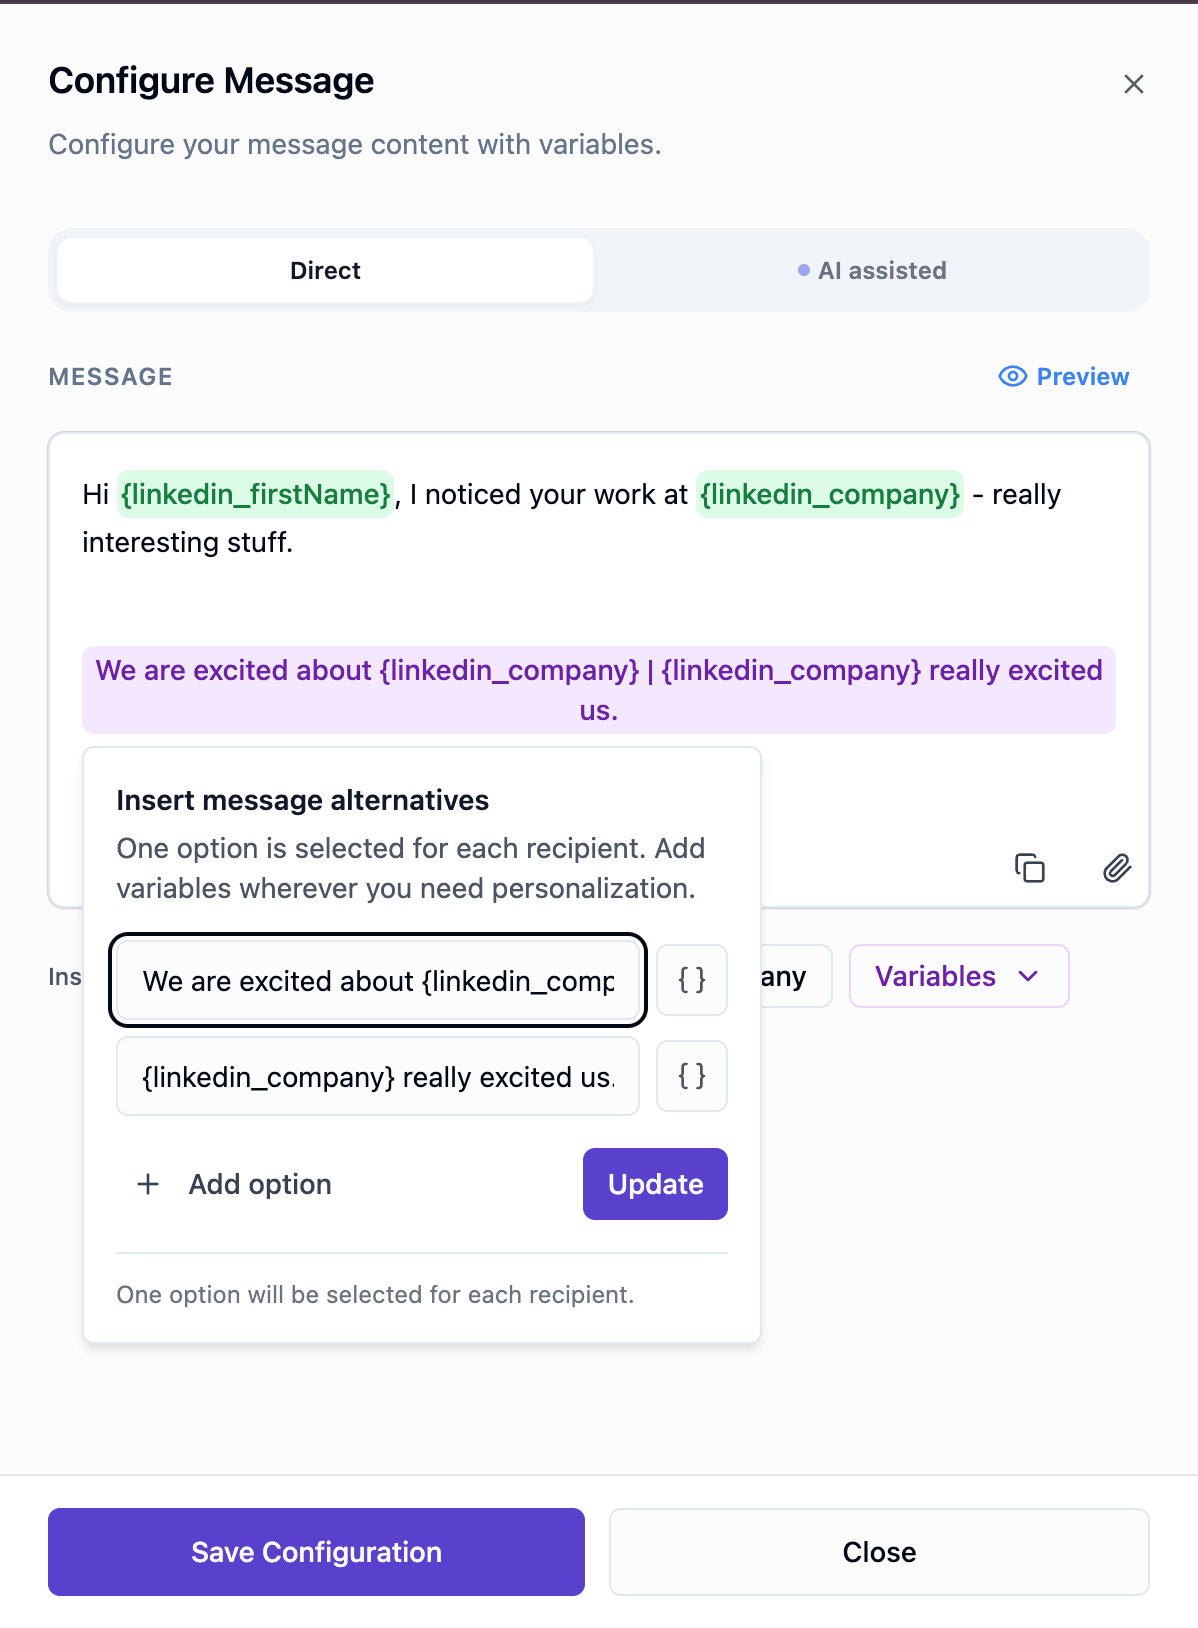
A group must always contain at least two non-empty options. The editor supports up to 20 options in one group.
Preview Before You Save
Click Preview in the message configuration to check the message as a recipient will see it. Preview shows a resolved alternative rather than sending the purple editor block or raw spintax markup.
Check that:
- Every alternative reads naturally with the text before and after it.
- Punctuation and spaces work for every possible option.
- Variables resolve to the expected LinkedIn or CSV values.
- Each possible connection-note alternative stays within its character limit after personalization.
When everything looks right, click Save Configuration.
A Complete Example
Start with this fixed text:
Hi {linkedin_firstName},
Then add a spintax group containing:
- I noticed the work your team is doing at {linkedin_company}
- Your role at {linkedin_company} caught my attention
- I came across your profile while researching {linkedin_company}
Finish with fixed text:
Would you be open to connecting?
Each recipient receives one of the three middle sentences, with their first name and company filled in.
Quick Summary
Use Variables → Add spintax, or type { and select Add spintax. Add at least two complete alternatives, use the {} button to insert LinkedIn or CSV variables inside any option, preview the possible result, and then save the message configuration.