When running LinkedIn outreach at scale—whether you are a growth agency managing dozens of client profiles or an enterprise GTM team coordinating SDRs across different product lines—keeping your data clean and organized is critical.
Mixing accounts, lead lists, and team permissions in a single workspace leads to operational clutter, compliance headaches, and accidental cross-messaging.
OutFlo’s Multi-Workspace and Member Management system is engineered specifically to solve this. It provides complete multi-tenant isolation, allowing you to partition campaigns, connected LinkedIn profiles, and lead lists into distinct workspaces while centrally controlling member access and roles.
Here is your step-by-step playbook on how to configure, scale, and manage workspaces and team members inside OutFlo.
Step 1
Enabling Multi-Workspace Management
By default, every organization operates within a primary workspace. If your growth strategy involves managing multiple client accounts, separate sales tiers (e.g., Enterprise vs. SMB outbound), or dedicated regional teams, your first step is enabling multi-workspace capability.
To enable multi-workspace partitioning:
- 1.Navigate to Settings in the left-hand sidebar menu.
- 2.Select the Workspaces tab under organization settings.
- 3.Toggle the Enable Multi-Workspace switch to ON.
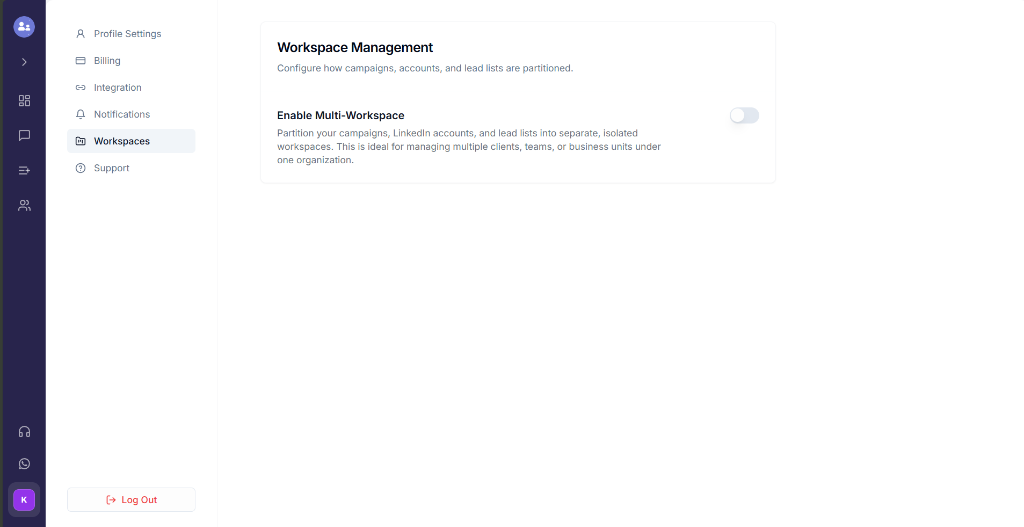
Once enabled, OutFlo automatically unlocks complete data partitioning. Every campaign, connected sender profile, and prospect list will remain strictly isolated within its assigned workspace.
Step 2
Creating and Switching Between Workspaces
After enabling multi-workspace mode, you can create dedicated environments tailored to your organization's structure.
Creating a New Workspace
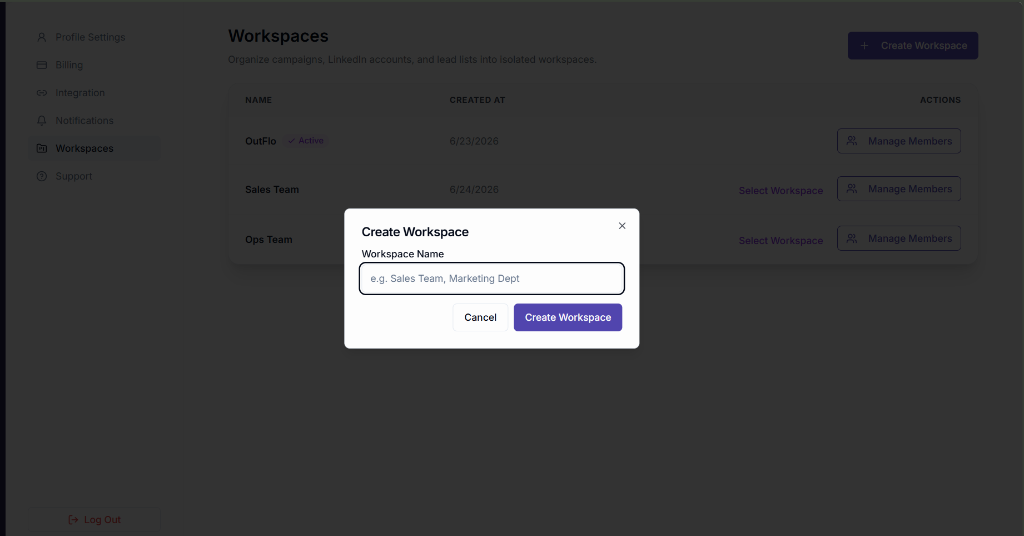
- 1.From the Workspaces settings view, click the + Create Workspace button in the top-right corner.
- 2.In the modal dialog, enter a descriptive workspace name (e.g., "Sales Team", "Marketing Dept", or a client's brand name).
- 3.Click Create Workspace.
Switching Workspaces
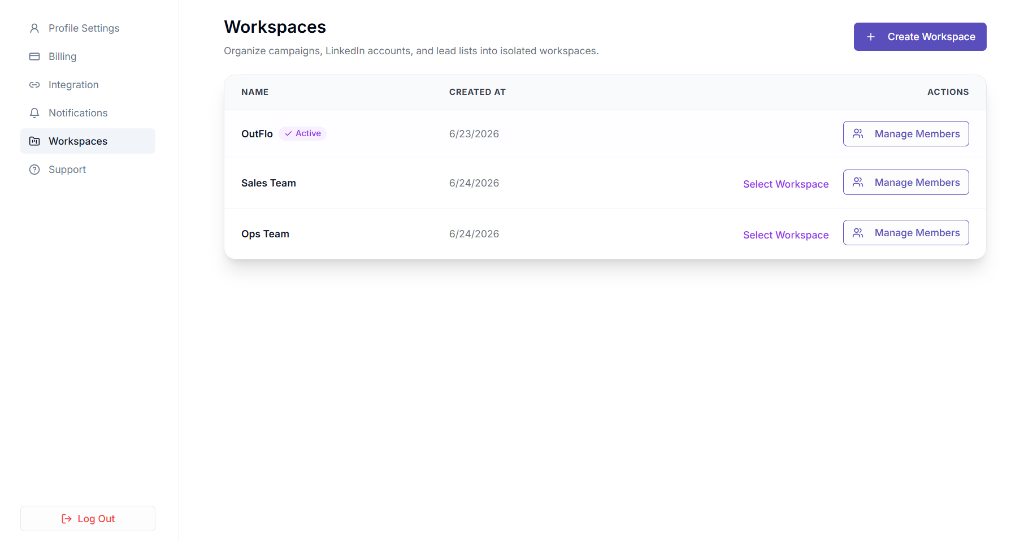
You can view all active and created workspaces from your dashboard list. To switch context, simply click Select Workspace next to any listed environment. The active workspace will display an Active badge, ensuring you are always clear on which client or team environment you are configuring.
Step 3
Managing Workspace Members and Roles
Collaborative outbound requires granting team members access only to the accounts and campaigns relevant to their role. OutFlo allows organization administrators to assign granular member access per workspace.
To manage existing members within a workspace:
- 1.Go to Settings > Workspaces.
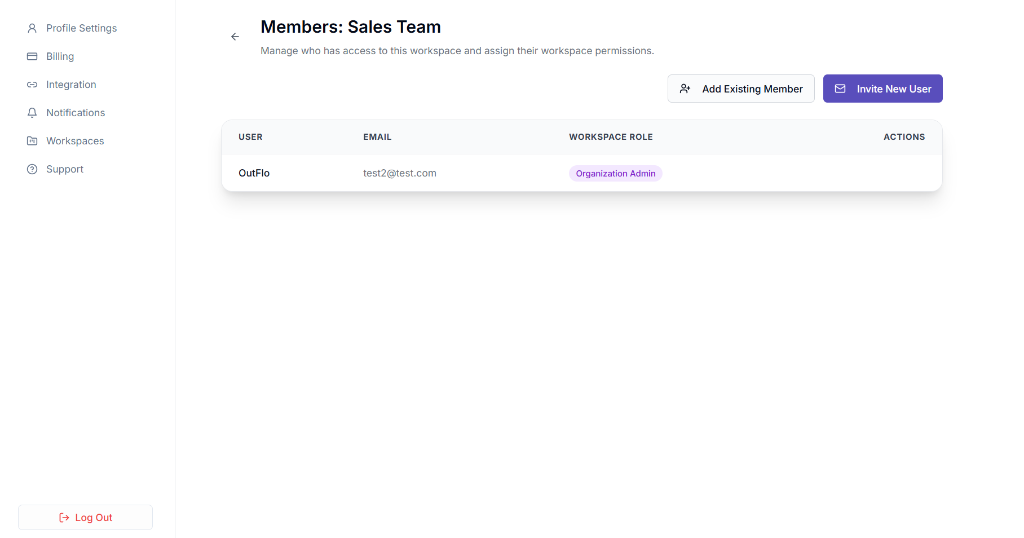
- 2.Click Manage Members next to the target workspace.
- 3.View the list of active users, their registered emails, and their assigned Workspace Role (such as Organization Admin, Workspace Manager, or SDR).
Step 4
Inviting New Teammates to Your Workspace
Bringing team members or clients into your workflow takes just a few seconds.
To invite a new user:
- 1.On the Members page for your designated workspace, click Invite New User.
- 2.Enter the user's corporate email address.
- 3.Select the appropriate Workspace Role from the dropdown menu to define their access permissions.
- 4.Click Send Invitation.
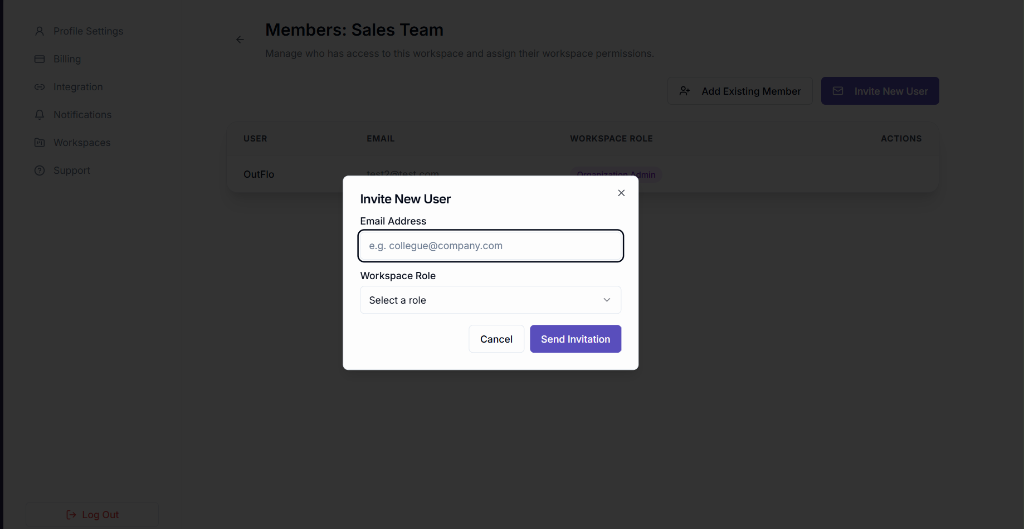
The invited user will receive an automated onboarding link allowing them to join the workspace with pre-configured access permissions immediately.
Best Practices for Agencies & Sales Leaders
- Use Case
- Lead-Gen Agencies
- Recommended Workspace Setup
- 1 Workspace per Client Brand
- Key Benefit
- Complete data privacy & zero cross-client profile contamination
- Use Case
- B2B Sales Teams
- Recommended Workspace Setup
- Workspaces by Region or Deal Size (e.g
- EMEA vs
- AMER)
- Key Benefit
- Clean reporting & SDR accountability per territory
- Use Case
- Multi-Brand Holdings
- Recommended Workspace Setup
- Workspaces by Subsidiary Unit
- Key Benefit
- Centralized billing with decentralized campaign execution
| Use Case | Recommended Workspace Setup | Key Benefit |
|---|---|---|
| Lead-Gen Agencies | 1 Workspace per Client Brand | Complete data privacy & zero cross-client profile contamination |
| B2B Sales Teams |
| Clean reporting & SDR accountability per territory |
| Multi-Brand Holdings | Workspaces by Subsidiary Unit | Centralized billing with decentralized campaign execution |
Summary
OutFlo's workspace architecture ensures that as your outreach volume scales across multiple accounts and teammates, your operational workflow stays clean, secure, and organized.
Ready to streamline your team's LinkedIn automation? Log into your OutFlo Dashboard today to configure your multi-workspace environment!